Quick Start
Basic Components brings modern UI component patterns to Python web applications. This guide will help you get up and running quickly with your first components.
Use the components cli to install components directly into your project.

Install a component
# Install uv package installer if you haven't already
curl -LsSf https://astral.sh/uv/install.sh | sh

# Install your first component
uvx --from basic-components components add button

# Preview installation with --dry-run
uvx --from basic-components components add dropdown_menu --dry-run
Prerequisites
Before installing components, ensure you have:
- Python 3.10 or higher
- uv package installer installed
- A Python web framework (FastAPI, Django, or Flask), examples apps are included for each.
- Tailwind CSS configured in your project
- JinjaX installed and configured
- Alpine.js configured in your web templates
- htmx configured in your web tempates
Step-by-Step Setup
1. Initialize Components Directory
First, create the components directory structure:
uvx --from basic-components components initThis creates a components/ui directory in your project where components will be installed.
2. Install Components
Install your first component:
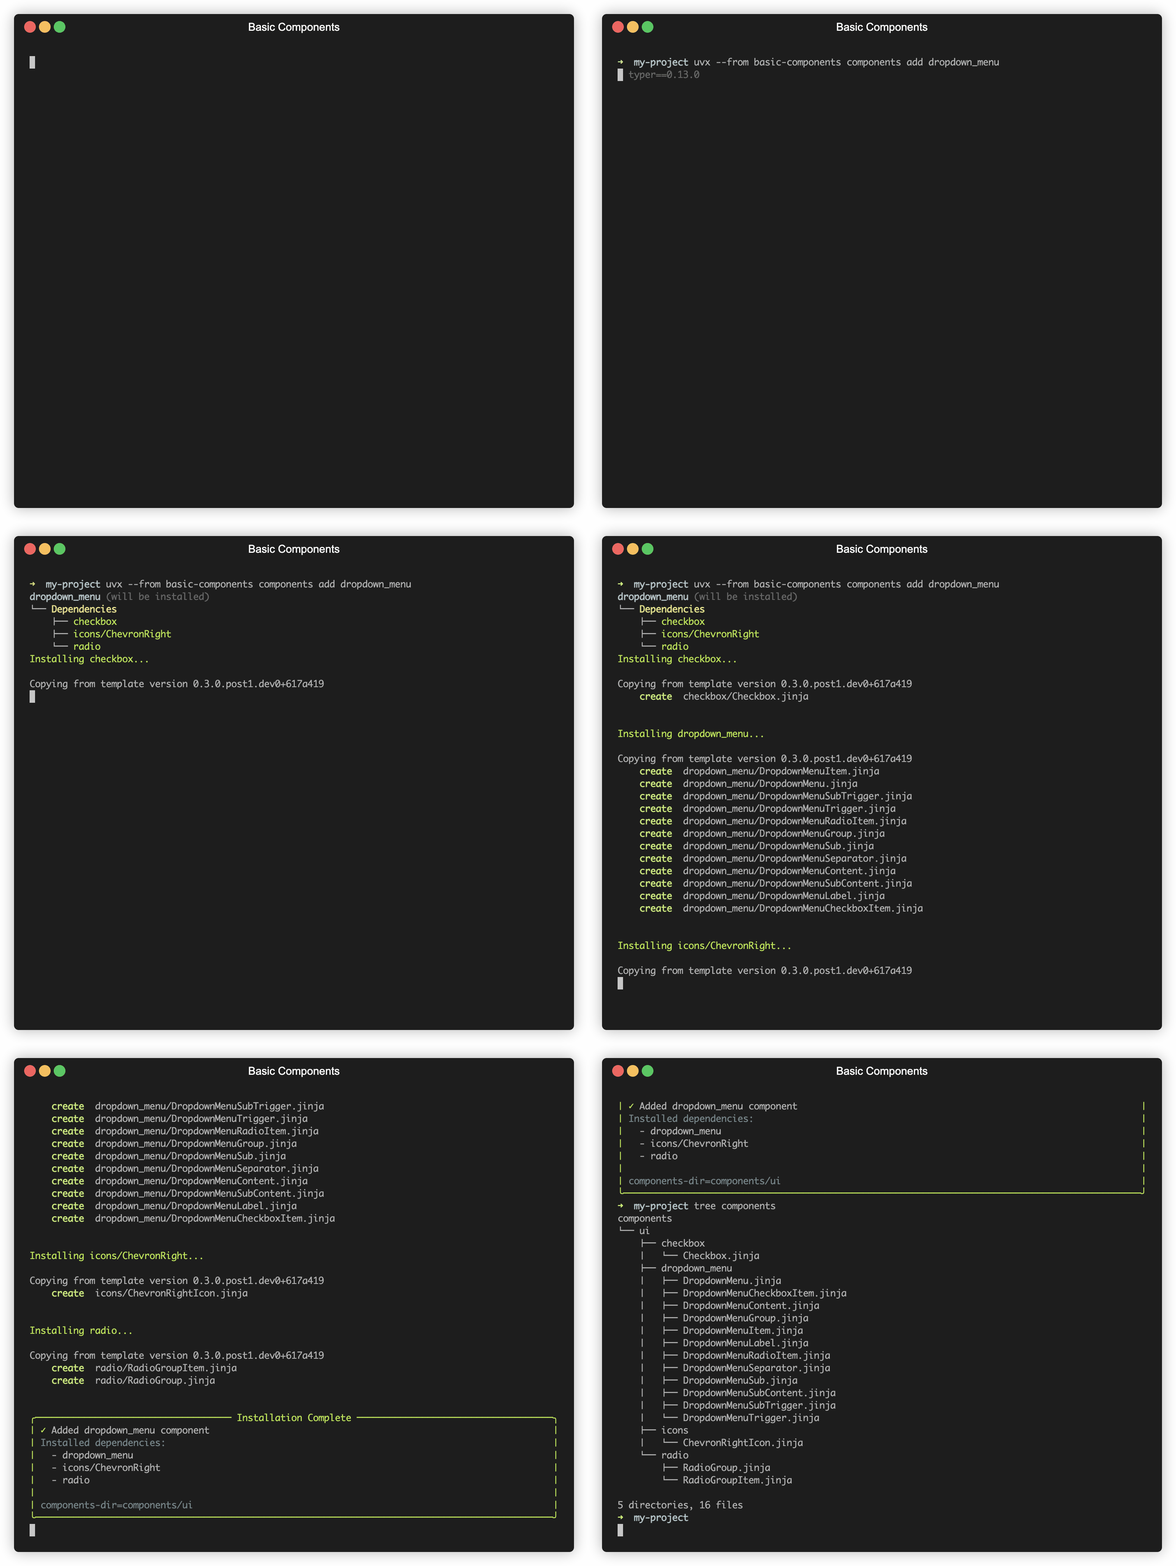
uvx --from basic-components components add buttonDependencies are handled automatically. For example, when installing dropdown_menu, its required components are installed too:
uvx --from basic-components components add dropdown_menu3. Set Up Utilities
You have two options for adding required utilities:
Option 1: Install the utils package (Recommended)
Install the utils package which includes cn() and other utility functions:
uv add "basic-components[utils]"This provides:
cn()utility for Tailwind class name management- JinjaX configuration helpers
Option 2: Manual Setup
If you prefer to manage the utilities yourself, create lib/utils.py:
from typing import List

def cn(*args: List[str]) -> str:
    """Merge CSS class names"""
    # see https://github.com/basicmachines-co/basic-components/blob/main/basic_components/utils/tailwind.py
    return ' '.join(filter(None, args))
See the utilities docs for configuring the cn() function in the jinja global environment.
4. Configure JinjaX
If you installed basic-components[utils], you can use the provided configuration:
from basic_components.utils.jinjax import setup_component_catalog
from starlette.templating import Jinja2Templates
import jinjax

COMPONENT_DIR = "components"

templates = Jinja2Templates(directory="templates")
templates.env.add_extension(jinjax.JinjaX)
catalog = jinjax.Catalog(jinja_env=templates.env)

# include all subdirectories in the JinjaX catalog.
catalog = setup_component_catalog(
    catalog, components_dir=COMPONENT_DIR
)
Or configure JinjaX manually:
from jinjax import Jinja

templates = Jinja(
    template_dirs=["templates"],
    component_dirs=["components"]
)

catalog = jinjax.Catalog(jinja_env=templates.env)

# add all dirs with components to the catalog
catalog.add_folder("components/ui")
catalog.add_folder("components/ui/button")
See the utilities docs for more about the setting up components with JinjaX.
Usage
Basic Components works with any Python web framework that supports JinjaX. Here are examples for common frameworks:
FastAPI
<!doctype html>
<html>
<head>
  <title>Example</title>
  <!-- Include the Alpine.js library -->
  <script defer src="https://cdn.jsdelivr.net/npm/alpinejs@3.14.1/dist/cdn.min.js"></script>
  <!-- Include the TailwindCSS library -->
  <link href="/static/dist/output.css" rel="stylesheet"/>
  <!-- tailwind inter font -->
  <link rel="stylesheet" href="https://rsms.me/inter/inter.css"/>
  <!-- htmx -->
  <script src="https://unpkg.com/htmx.org@1.9.12"></script>
</head>
<body class="min-h-screen bg-white dark:bg-black text-black dark:text-white">

<div class="mt-40 flex justify-center justify-center w-full">

  <!-- Card component example -->
  <Card className="w-[350px] mb-4">
    <CardHeader className="pb-3">
      <CardTitle>Components!</CardTitle>
      <CardDescription className="max-w-lg text-balance leading-relaxed">
        Using components is fun.
      </CardDescription>
    </CardHeader>
    <CardContent>
      The button below is enabled with htmx. Click to update it.
    </CardContent>
    <CardFooter>
      <!-- use htmx -->
      <Button
        variant="outline"
        hx-get="/button"
        hx-trigger="click"
        hx-target="this"
        hx-swap="outerHTML">htmx is enabled</Button>
    </CardFooter>
  </Card>
</div>

</body>
</html>
"""
FastAPI example application demonstrating:
- JinjaX component integration
- Static file serving for Tailwind CSS
- HTMX dynamic updates
- Component rendering
"""
from typing import Any
from fastapi import FastAPI, APIRouter, Request
import jinjax
from starlette.responses import HTMLResponse
from starlette.staticfiles import StaticFiles
from starlette.templating import Jinja2Templates
from basic_components.utils.jinjax import setup_component_catalog
from basic_components.utils.tailwind import tw
# Configuration
TEMPLATE_DIR = "./templates"
STATIC_DIR = "./static"
# Setup Jinja templates with JinjaX support
templates = Jinja2Templates(directory=TEMPLATE_DIR)
templates.env.add_extension(jinjax.JinjaX)
# Add cn to globals
templates.env.globals["cn"] = tw
# Configure JinjaX component catalog
catalog = jinjax.Catalog(jinja_env=templates.env)
setup_component_catalog(catalog)
class HTMLRouter(APIRouter):
"""Router configured to return HTML responses by default."""
def __init__(self, *args: Any, **kwargs: Any) -> None:
super().__init__(*args, **kwargs)
self.include_in_schema = False
self.default_response_class = HTMLResponse
router = HTMLRouter()
@router.get("/")
async def index(request: Request) -> HTMLResponse:
"""Render the main page with component examples."""
return templates.TemplateResponse(request, "index.html")
@router.get("/button")
async def button(request: Request) -> HTMLResponse:
"""
Example endpoint demonstrating direct component rendering.
Used by htmx for dynamic button updates.
"""
return HTMLResponse(catalog.render("Button", variant="destructive", _content="HTMX IS ENABLED!"))
# Create FastAPI application
app = FastAPI(
title="Basic Components Demo",
description="Demonstration of JinjaX components with FastAPI",
)
# Mount static files for CSS
app.mount(
"/static",
StaticFiles(directory=STATIC_DIR),
name="static",
)
# Include HTML routes
app.include_router(router)See the FastAPI example for a complete working project.
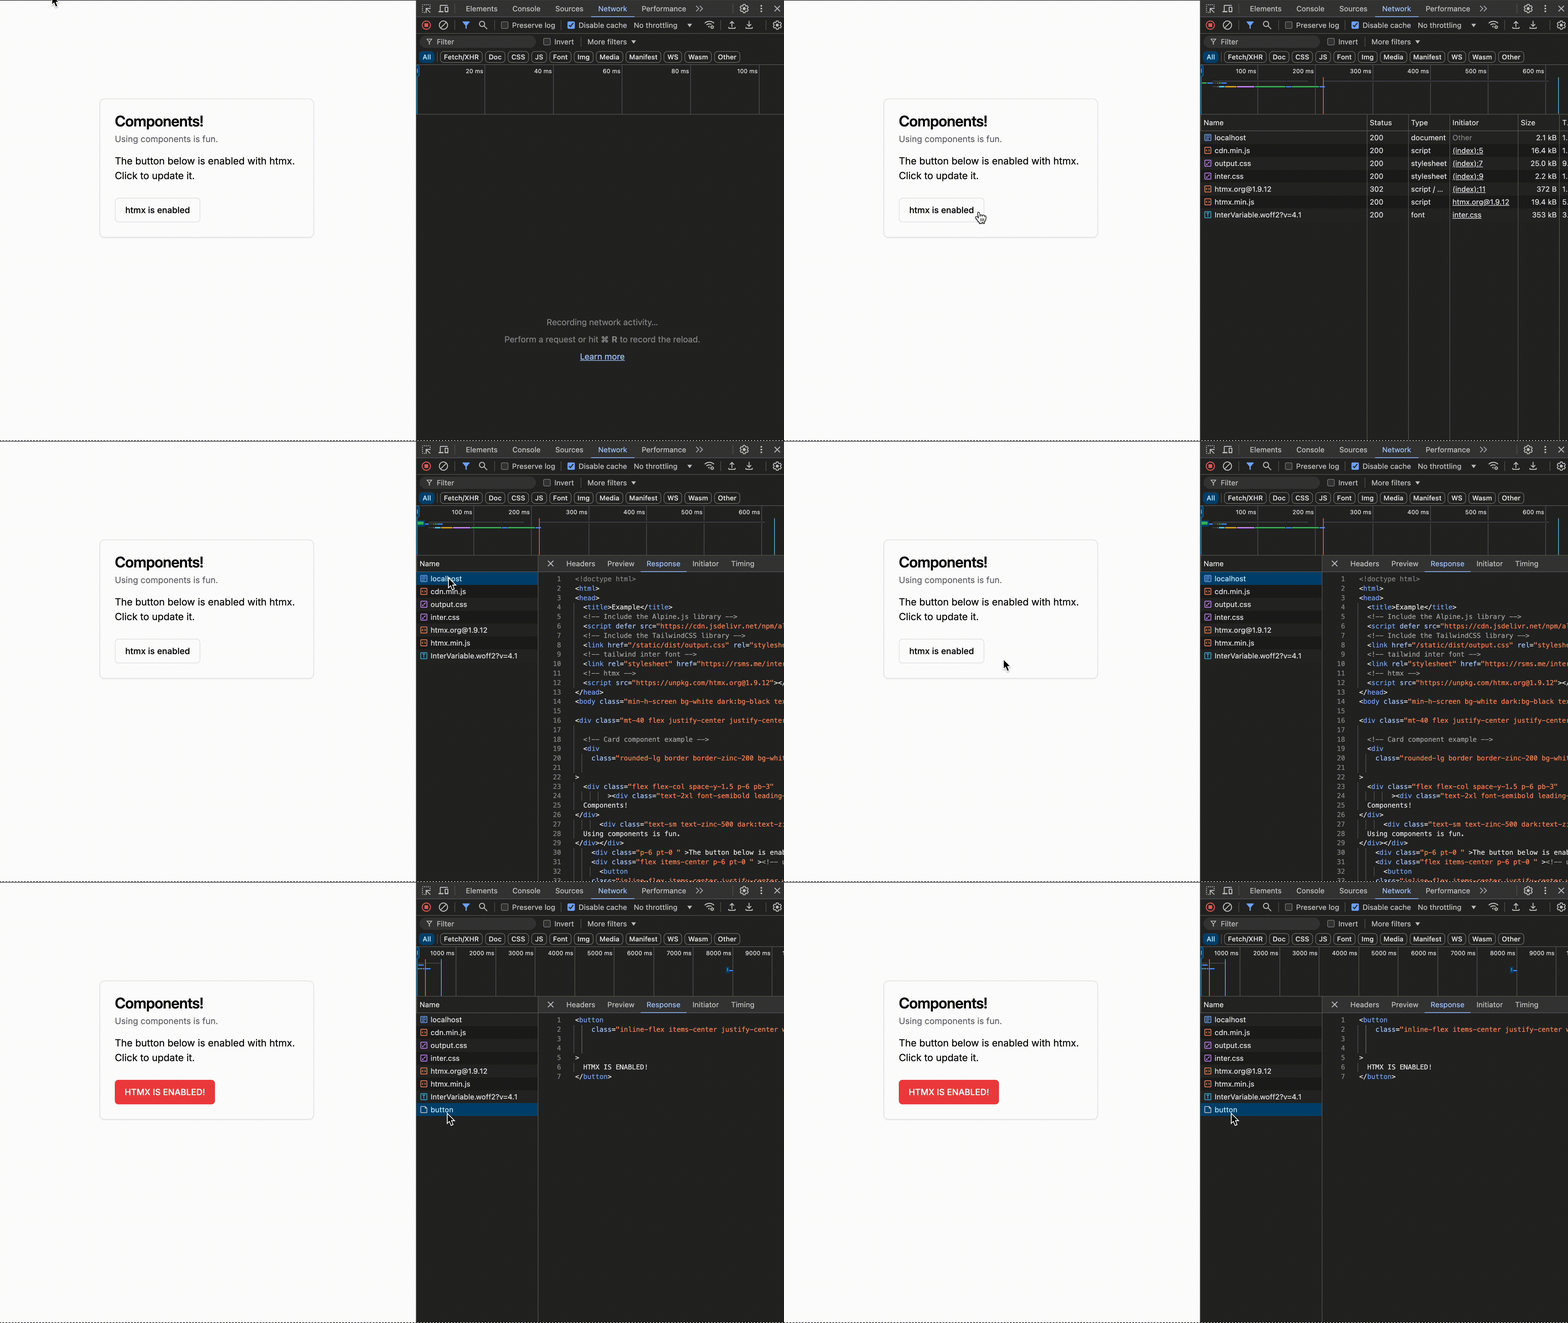
Components are easy to integrate with htmx.

Django and Flask
Similar setup is available for Django and Flask. See complete working examples:
Common Patterns
Component Customization
Components accept a className argument for additional styles:
<Button
    variant="outline"
    className="mt-4 w-full md:w-auto"
>
    Custom Button
</Button>
Using Variants
Some components support variants for different styles:
<Button variant="default">Default</Button>
<Button variant="destructive">Destructive</Button>
<Button variant="outline">Outline</Button>
<Button variant="secondary">Secondary</Button>
<Button variant="ghost">Ghost</Button>
Adding htmx Interactions
Components work seamlessly with htmx attributes:
<Button
    variant="outline"
    hx-post="/api/submit"
    hx-target="#result"
    hx-swap="outerHTML"
>
    Submit
</Button>
Managing State with Alpine.js
Components use Alpine.js for client-side state management:
<div x-data="{ open: false }">
    <Button
        variant="outline"
        x-on:click="open = !open"
    >
        Toggle
    </Button>
    <div x-show="open" class="mt-4">
        Content
    </div>
</div>
Next Steps
- Browse available components
- Learn about component dependencies
- Read the customization guide
- Check out example projects
Troubleshooting
- Components must be installed in the
components/uidirectory - Components may have dependencies that are installed automatically
- The
cn()utility function is required for class name handling - JinjaX must be configured to use the components directory
Need help? Check our GitHub issues or start a discussion.