FastAPI
Setting up FastAPI to serve components.
This guide demonstrates how to set up a FastAPI application with Basic Components, showcasing:
- JinjaX component integration
- Tailwind CSS styling
- Alpine.js interactivity
- HTMX dynamic updates
Prerequisites
Before starting, ensure you have:
- Python 3.8 or higher
- UV
- Node.js 16+ and npm 8+
- A text editor or IDE
Project Structure
The source is in examples/fastapi.
examples/fastapi/
├── app.py                      # FastAPI application
├── components                  # JinjaX components
│   ├── Button.jinja
│   ├── Card.jinja
│   ├── CardContent.jinja
│   ├── CardDescription.jinja
│   ├── CardFooter.jinja
│   ├── CardHeader.jinja
│   └── CardTitle.jinja
├── package-lock.json
├── package.json                # npm config (Tailwind)
├── pyproject.toml              # python project config
├── static                      # Static assets
│   ├── dist
│   │   └── output.css          # Compiled Tailwind CSS
│   └── src
│       └── input.css           # Source Tailwind CSS
├── tailwind.config.js          # Tailwind config
├── templates                   # Jinja template dir
│   └── index.html
└── uv.lock
<!doctype html>
<html>
<head>
  <title>Example</title>
  <!-- Include the Alpine.js library -->
  <script defer src="https://cdn.jsdelivr.net/npm/alpinejs@3.14.1/dist/cdn.min.js"></script>
  <!-- Include the TailwindCSS library -->
  <link href="/static/dist/output.css" rel="stylesheet"/>
  <!-- tailwind inter font -->
  <link rel="stylesheet" href="https://rsms.me/inter/inter.css"/>
  <!-- htmx -->
  <script src="https://unpkg.com/htmx.org@1.9.12"></script>
</head>
<body class="min-h-screen bg-white dark:bg-black text-black dark:text-white">

<div class="mt-40 flex justify-center justify-center w-full">

  <!-- Card component example -->
  <Card className="w-[350px] mb-4">
    <CardHeader className="pb-3">
      <CardTitle>Components!</CardTitle>
      <CardDescription className="max-w-lg text-balance leading-relaxed">
        Using components is fun.
      </CardDescription>
    </CardHeader>
    <CardContent>
      The button below is enabled with htmx. Click to update it.
    </CardContent>
    <CardFooter>
      <!-- use htmx -->
      <Button
        variant="outline"
        hx-get="/button"
        hx-trigger="click"
        hx-target="this"
        hx-swap="outerHTML">htmx is enabled</Button>
    </CardFooter>
  </Card>
</div>

</body>
</html>
"""
FastAPI example application demonstrating:
- JinjaX component integration
- Static file serving for Tailwind CSS
- HTMX dynamic updates
- Component rendering
"""
from typing import Any
from fastapi import FastAPI, APIRouter, Request
import jinjax
from starlette.responses import HTMLResponse
from starlette.staticfiles import StaticFiles
from starlette.templating import Jinja2Templates
from basic_components.utils.jinjax import setup_component_catalog
from basic_components.utils.tailwind import tw
# Configuration
TEMPLATE_DIR = "./templates"
STATIC_DIR = "./static"
# Setup Jinja templates with JinjaX support
templates = Jinja2Templates(directory=TEMPLATE_DIR)
templates.env.add_extension(jinjax.JinjaX)
# Add cn to globals
templates.env.globals["cn"] = tw
# Configure JinjaX component catalog
catalog = jinjax.Catalog(jinja_env=templates.env)
setup_component_catalog(catalog)
class HTMLRouter(APIRouter):
"""Router configured to return HTML responses by default."""
def __init__(self, *args: Any, **kwargs: Any) -> None:
super().__init__(*args, **kwargs)
self.include_in_schema = False
self.default_response_class = HTMLResponse
router = HTMLRouter()
@router.get("/")
async def index(request: Request) -> HTMLResponse:
"""Render the main page with component examples."""
return templates.TemplateResponse(request, "index.html")
@router.get("/button")
async def button(request: Request) -> HTMLResponse:
"""
Example endpoint demonstrating direct component rendering.
Used by htmx for dynamic button updates.
"""
return HTMLResponse(catalog.render("Button", variant="destructive", _content="HTMX IS ENABLED!"))
# Create FastAPI application
app = FastAPI(
title="Basic Components Demo",
description="Demonstration of JinjaX components with FastAPI",
)
# Mount static files for CSS
app.mount(
"/static",
StaticFiles(directory=STATIC_DIR),
name="static",
)
# Include HTML routes
app.include_router(router)Setup Instructions
Install Dependencies
# Navigate to project directory
cd examples/fastapi

# Install npm dependencies for Tailwind
npm install

# Build Tailwind CSS
npm run build

# Create and activate Python virtual environment
uv sync
source .venv/bin/activate
Run the Application
# Start FastAPI server
.venv/bin/fastapi dev --port 10000
You should see:
INFO:     Uvicorn running on http://127.0.0.1:10000 (Press CTRL+C to quit)
INFO:     Started reloader process [37550] using WatchFiles
INFO:     Started server process [37552]
INFO:     Waiting for application startup.
INFO:     Application startup complete.
Enable Tailwind Watch Mode In a separate terminal:
npm run watch Verify Installation
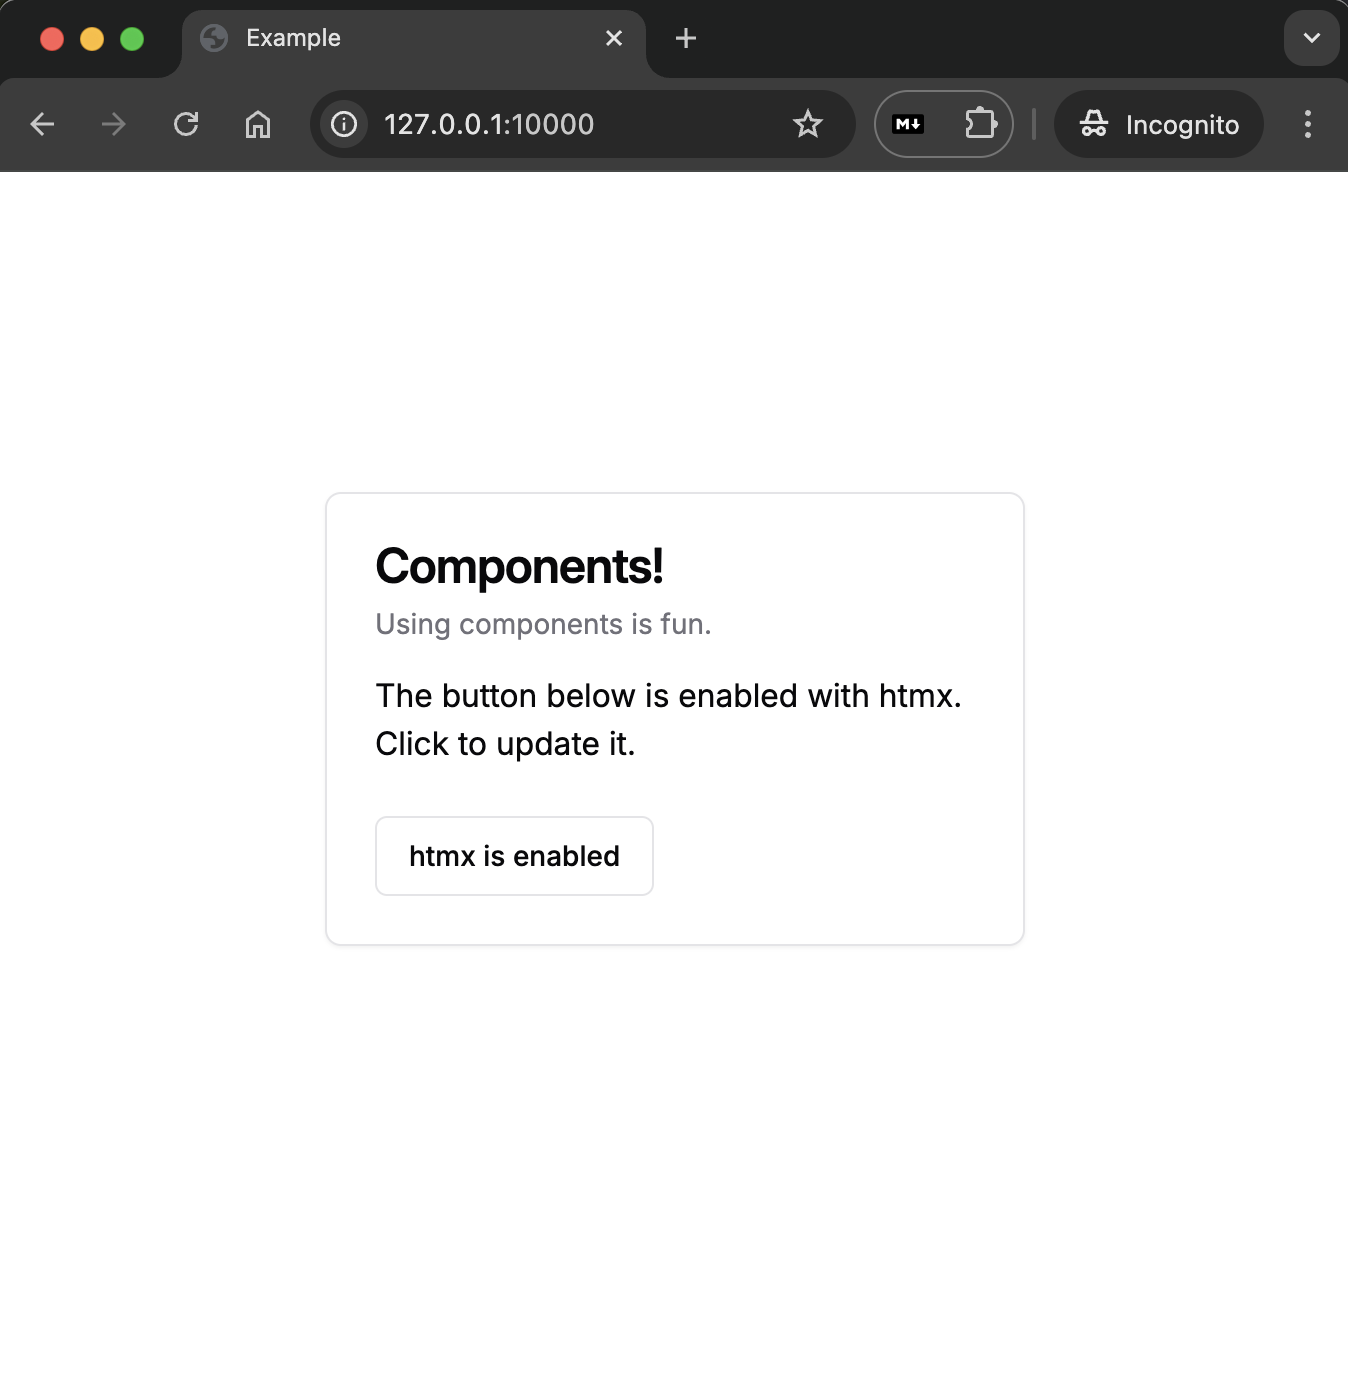
- Open your browser to http://127.0.0.1:10000
- You should see the example page with:
- Styled components using Tailwind CSS
- Working htmx button that updates on click
- Dark mode support

Common Issues and Solutions
-
Styles Not Updating
- Ensure Tailwind watch process is running
- Check that
/static/css/tailwind.cssis being served - Verify CSS path in template is correct
-
Components Not Found
- Verify
COMPONENT_DIRpath in app.py - Check component file extensions (.jinja)
- Ensure JinjaX extension is properly loaded
- Verify
-
Static Files 404
- Check
STATIC_DIRpath in app.py - Verify directory structure matches configuration
- Ensure static files mount is before router inclusion
- Check
-
htmx Not Working
- Check browser console for errors
- Verify htmx script is loaded
- Confirm route handlers return proper HTML responses
Next Steps
- Review the Components Guide to learn about available components
- Explore Modern Tools to understand the tech stack
- Check out the Examples for more usage patterns